Sculpting a heavy and tight metal tone for recording takes some learning and practice. In this post, we’re going to learn how the pro musicians record their metal guitars, just without the racks of expensive gear!
This article is aimed at the topic of hardware, software and recording tips you beginner metal enthusiasts will ever need for recording a metal tone in your bedroom studio.
Hardware Required
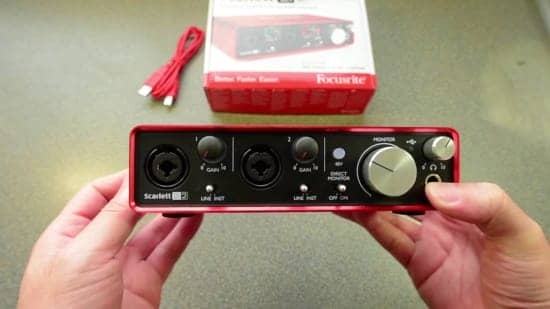
First off, you will need an audio interface, this is the ‘must have’ hardware to get serious with recording. Why is this?
The reason is you will need to capture your guitar’s signal with the best audio quality possible whether you are recording an amp or direct.
There are many audio capturing devices out there for recording instruments but the one I always recommend is a ‘USB audio interface’.
The reason these devices are so popular is that most entry-level USB interfaces are inexpensive, have excellent recording capabilities and the best option for beginners learning the ropes.
An interface functions by converting the analog signal from your guitar to a digital waveform for use in your PC and recording software for further audio manipulation.
If you are without a device and unsure which USB interface to purchase, I have written a killer post you should see on the best and most affordable USB audio interfaces I recommend for recording guitar here.
As a side note, I have an awesome post explaining the differences between a DI box and an Audio interface. Read this post here!
Choosing a DAW
With a device sorted, to record your instruments on your PC you will need software known as a DAW (Digital Audio Workspace). This is to record, edit, mix, add plug-ins, VSTs, compression, EQ effects, and export.
I agree free DAWs are ok for beginners getting started and learning the basics. However, many of them lack the key ingredients for creating a professional recording such as adding plugins/VSTs, recording instruments and a whole list of other features.
For these reasons alone, it won’t take long to realize that your free DAW is not up to scratch, and soon you’ll be back on the internet searching for a paid DAW in no time.
The truth is, If you want to get serious with recording and producing, you will certainly need to invest in a professional paid DAW. The question will then arise, what is the best paid DAW that’s actually affordable?
The Best Affordable DAW?
When it comes to choosing a paid DAW, there are many advance programs such as such as ‘Pro tools’, ‘Cubase‘, ‘Logic’ etc. With all this choice, it’s difficult for a beginner to nail a simple, functional and ideal DAW for recording metal without breaking the bank.
If you are without a paid DAW, I highly recommend Reaper. (as of writing this) Reaper is only $60 for a license which is far less than most paid programs.
Without rambling on, I cannot recommend Reaper enough as there’s a large community that loves Reaper for its advanced features, simplicity, and affordability making it the best choice for beginners starting out.
Even professional producers like Reaper for its design and functionality. This DAW has everything and more to create high-quality recordings and learn how to master the basics of recording and producing.
Reaper is, therefore, my recommendation if you happen to be without any professional recording software. When armed with a DAW, next you must decide how you will record your guitar!
Option 1: Recording Guitar Direct
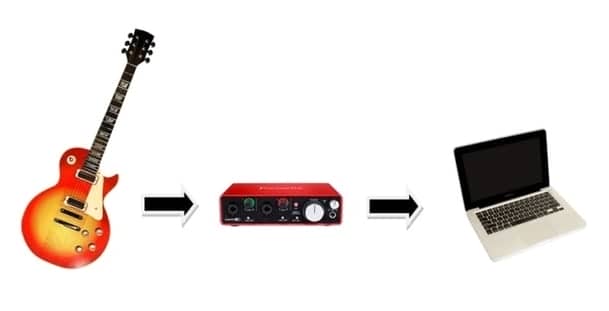
The most convenient and practical way of recording is directly through the direct injection method. Also known as ‘DI’ing’.
In the modern digital world of recording, DI’ing is fast becoming the most popular way of recording metal tracks.
Mainly due to the abundance of amp simulators and the sea of metal plugins available. Amp sims and plugins can replicate iconic high gain amps and offer infinite tonal customization.
All without the impracticality of recording a loud tube amplifier, and the expensive cost of studio time.
Thanks to the digital world, both the professional recording metal musician and bedroom recording enthusiast, can lay down a professional sounding metal track with limited amounts of expensive gear.
Pros
- No need to record a physical amp
- A simple and convenient way to record at home
- Audio interfaces are affordable
- Amp simulation programs have a large amount of tone customization
- Record silently
Cons
- Digital sound
- Less responsive
- Paid amp sims can be expensive
- Clean tones are not as genuine as analog sounds
Choosing an Amp Simulator or Plugin
Virtual instruments and plugins can transform your input signal to model heavy sounding amplifiers for realistic metal tones for recording.
Amplitube, Guitar Rig, and Bias FX are programs that offer a massive catalog of simulated metal amps such as Mesa Boogie, Engl, Diezel and many more with pedals, reverb, delays and special FX .
All are fully customizable to sculpt your ideal metal tone.
Best Paid Amp Simulators for Metal?
Amplitube 4 (base version $149)
- Includes the most metal amp presets
- Great tone modification options
- Includes a built-in DAW for recording
- Includes many add on amp packages
- Free demo version
- Requires a 64-bit system to run
Schuffham S Gear: $129
- 5 amps 1 being a Mesa Boogie
- Can be used in standalone or in a DAW
- 15-day free trial
Guitar Rig 5 Pro: $199
- The lighter choice when it comes to metal amps but includes good distortion presets
- Has more amplifiers as standard compared to Amplitube 4
- Could be used in a live setup
Using Plugins for Metal Tones
Alternatively, there’s a vast amount of free metal guitar plugins on the internet instead of investing in a paid amp simulator. Plugins work by recording your signal first, then activate the plugin after, to layer a realistic guitar tone over your recorded signal.
Plugins are great because they are free, but lack the same amount of presets as a paid amp sims. They sound great and sound just as authentic as the paid sims.
Keep in mind, most metal plugins come with the amps head so you will also need a cabinet simulator for your tones to sound realistic. Another advantage of the DI method is the signal does not pass through the air which can be hampered from external noises degrading the recording quality.
Best Free Plugins for Metal Guitars
LePou Amp Suite
- Regarded as the best sounding free amp simulator available
- includes 5 amps to use as a plugin in your preferred DAW.
- You will need a cab emulator to go with the amplifier pack.
Ignite Amps
- The “Emissary” is a great sounding high gain tube amp
- Graphics look great
- Comes with cabinet simulator and presets
Brainworx bx rockrack V3 Player
Includes 5 channels: Marshall 800 dirty + clean, ENGL dirty + clean and Mesa Boogie Rectoverb
Includes a cabinet simulator
Option 2: Recording Amp with a Microphone
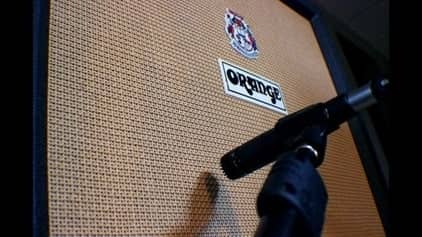
The other method would be to record your amplifier the good old fashioned way with a mic.
If you have an amp and killer pedal board that produces a tight high-gain saturated tone which you like the sound, then do it! Recording a live amp the old fashioned way is still one of the best ways to record metal guitars.
Ideally, your amp head or combo will need to produce a high gain saturated tone. If the amp needs more bite, adding a distortion pedal, tube screamer or EQ pedals will definitely help the cause. Here’s what you will need…
- Audio interface
- Microphone (Dynamic or Condenser)
- Microphone stand
- Amplifier
- Pedals (if needed)
Solid State or Valve Amp for Recording?
Solid state amps are usually preferred when recording at home the reason being they can produce a high gain tone at lower volumes.
They also have the advantage of added tonal options. Some solid states have modeling technology to mimic other amplifiers and have a host of effects.
The only disadvantage is the digital aspect of the gain as solid states distortion is known for being ’fizzy’, ‘loose’ and too ‘processed depending on the amp.
Tube amps, however, need the master volume cranked in order to push the tubes to produce a saturated sound.
Although the tube distortion sounds smoother, warmer and more genuine than solid state, this does come with the burden of annoying residents that live around you.
Furthermore, If you are without a pedal board, you are limited to the sounds and tones on your amp. Ultimately, there’s no right or wrong amplifier to record with. The choice comes down to personal preference, and the current gear you have available.
Which Microphone?
Next, you will need to decide on your microphone and the position of the mic. There are two options, a ‘dynamic’ and ‘condenser’ microphone.
Dynamic
When it comes to choice, there’s no right or wrong but if undecided, a dynamic mic is usually favored for recording metal amplifiers.
Mainly because dynamic mics use a heavy coil to capture audio, meaning they handle aggressive volumes and capture better mid-range frequencies. A wider mid-range capture, in my opinion, is key for recording a good metal tone.
A solid dynamic mic is the Shure SM57 which is the legendary standard of guitar amp microphones, alternatively, there are other candidates: ‘Sennheiser e609’, ‘Telefunken M81’ and ‘Neumann U47’ to name a few.
Condenser
Condenser microphones are usually preferred for recording softer sound sources such as vocals and acoustic guitars. Mainly because they use a small diaphragm instead of a heavy coil to record audio.
This design translates into a brighter sound which is more sensitive to transience. If you have both at your disposal, experiment with both and see what recordings you prefer.
Another option is to record with both microphones. This has the benefit of filling in the blanks that the dynamic microphone will leave out. This creates a more balanced recording by capturing a nice blend of both mics tonal qualities. It also adds more customization so you can sculpt that ideal metal tone.
Positioning the Microphone
Keep in mind, moving the microphone as much as an inch will change the tone. So question is, how do you dial in a good tone without fiddling around with mic placement all day? Finding the amps ‘sweet spot’ is not rocket science. Luckily, the fundamentals still stay the same.
Take a flashlight and rest it on the cabinet cloth to locate the center of the speaker cone. If your cabinet has multiple speakers, listen to each one individually and select the one that suits your tone the best.
Once located the speaker, a good place to begin with a dynamic microphone would be halfway between the center and edge of the speaker cone. With this landmark located, ensure that the mic is a few inches away from the cloth.
There’s no right or wrong way with microphone placement, as there are a vast amount of tones you can create. Here are some basic guidelines…
- Moving the mic closer to the cone of the speaker, will result in a brighter and more present sound.
- Moving the mic closer to the edge of the speaker, will result in a darker and more mid-range tone.
- Moving the mic away from the cabinet will mix some of the sounds that are bouncing around the room. Which is neither a good thing or bad thing depending what tone you wish to sculpt.
- Facing the mic towards the speaker will create a brighter tone.
- Facing the mic away from the speaker will create a darker tone.
The trick is to play around with microphone placement until you find a tone you like that suits your amp and gear. I can go into much depth about microphone placement, but here’s a great recourse here.
Pros
- Record your own amplifier
- More analog sound
- Learn about microphone placement and train your ear
- Record your own pedal board or any outboard effects
Cons
- Takes more time to set up and less practical
- Tube amps need to be cranked for a heavy saturated tone
- Room acoustics play a part in recording
- Stuck with the sound of available gear
The Ideal Metal Guitar
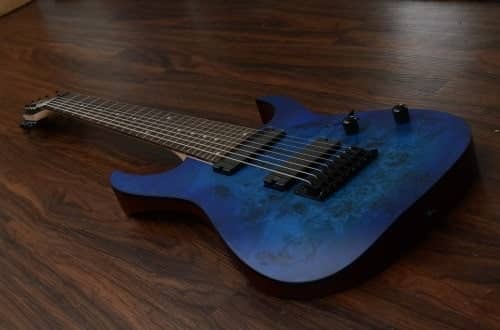
It is worth noting, before we can discuss about software and recording. We have to ask if the guitar you have is ideal for recording metal tones?
The guitar you have is the first step in the signal chain, and is important when identifying your personal sound. When it comes to metal guitar, the material, hardware, build quality and construction are all factors that depict the sound quality of your axe.
A solid body guitar that is constructed of a wood that offers a rich, dark and resonant sound (usually mahogany, alder, basswood) sets you up for an ideal metal tone. A smooth thin neck offers comfort and is easier for technical runs and fast playing. Usually a set neck offers usually more sustain than a bolt on neck.
A heavy gauged set of string will be a must for providing enough tension and handling dropped tunings. Heavier strings also provide more output resulting in a fatter tone and hold their intonation better.
Having a locking tremolo system such as a ‘Floyd Rose’ does have its pros and cons. But will be ideal for aggressive playing and use of the whammy bar to ensure accurate tuning.
A set bridge is also fine providing that other aspects of the guitar set up will keep the tuning accurate such as: string tension, nut design, angle of the headstock, locking tuners, bridge hardware etc.
Everything About Guitar Pickups
Since most metal songs are played in low dropped tunings which can go as far as drop A. The guitar must have pickups that respond well with low and mid-range frequencies. This means a tight bass response will be needed for the low notes for optimal recording quality.
Active Pickups
It is usually personal preference to the guitarist, but in most cases active pickups have always been favored for producing the best metal tones. Mainly because active pickups have a dedicated pre-amp to deliver more output, which will drive the amplifier harder resulting in more gain.
Active pickups also offer a “crunch” tone at lower volumes, as they are designed to saturate quicker and offer more bite.
Active pickups also act as compressors which allow the quieter notes to be heard adding clarity to the tone. The pickups that come to mind are the EMG 81’s/85 and Seymore Duncan Blackouts.
Other companies such as Bareknuckle, DiMarzo do some really good active pickups. Active pickups are mainly preferred due to their tonal qualities when mixed with ultra high saturated gain.
This is not to say that passive humbuckers will not do the job, there are pros and cons to active and passive pickups. I will admit, passive pickups will provide a warmer tone, there are also passive pickups on the market that do deliver high output it all comes down to personal preference and the tone you want to achieve.
How to Record Metal Guitar in Reaper
First, ensure that your Interface has the latest drivers downloaded on your PC. The next step will be to launch your recording software and select ‘ASIO’ as the main audio source.
Next, select your interface as the main recording device. This is how it looks in Reaper. You will also need to ensure that your downloaded plugins are located within your DAWs plugin files so they are activated for use.

Connect your cables to the interface and test the input signal strength while playing some notes and chords. This is to achieve a strong signal from the guitar which will offer a good noise to signal ratio while leaving plenty of headroom for mixing.
Set the Correct Levels For Recording
Before recording, you will want to set the gain on your interface known as ‘gain staging’, ensuring there is enough volume for recording but not too much to cause clipping. Clipping is known as a waveform distortion that is only present when an output voltage has exceeded its maximum threshold.
When a digital signal has exceeded its natural range it distorts and hampers the sound quality which is less than ideal when recording.
The key to this step is to adjust the interfaces gain to the highest level just before clipping occurs for a strong but safe signal. Some interfaces have the feature of viewing the feedback strength of the input signal.
Whether recording directly or through a microphone, play some palm muted notes and view the interface to see if the signal close to clipping, as palm mutes create a high bass response compared to regular notes.
This is so you know your “ceiling” which is the amount of gain left we have to work with before clipping occurs. On the other hand, make sure there’s enough gain to ensure a good signal to noise ratio.

In your DAW there will be an option to view the level of the signal either in the mixer or the instrument track.
Here is where you can see the signal you want to hear a good level of feedback from the monitors without clipping or going close to the red.
When you have a clear, high quality signal from your audio interface it makes the sound more crisp and better for recording.
Setting up a track for Direct Recording
create a ‘mono’ track and select the connected input on the interface. Hit the ‘record monitoring’ button which is an icon of a speaker and ‘arm recording’ to hear back the processed guitar signal.
A signal should be showing on the tracks meter or mixer when playing the guitar indicating the guitars signal strength.
Make sure the signal is strong but away from the red to avoid clipping. Add a VST by selecting the “FX” tab. From there select the amp simulator you wish to use and modify your desired tone. Press the record to begin the recording process and away you go!
When recording plugins things are slightly different, you will have to record the dry guitar signal first, then add your plugin after.
When you have recorded your guitar track. Press ‘FX’ in your recorded track and add your desired metal plugin. As mentioned, you will need a cabinet simulator plugin to go with your amp head plugin.
Setting up a Track for Amplifier Recordings
With your microphone perfectly placed on the cabinet, connected to the interface and ready to go. In your DAW, create a mono track and select the interfaces microphone input. click the ‘record monitoring’ and ‘arm recording’ to hear the amps sound through your monitors.
Remember to tweak the placement of the microphone until you a happy with the tone. Before recording, check the signal strength from the microphone input, if the signal is pushing the meter into the red dial back the gain on the interface. Press record and away you go!
For rhythm sections, record two performances panning one left and the other right creating a wider and fatter sound in your mixes. You could also record the second performance with a different: tone, pickup selector or guitar to help distinguish the guitars overall sound.
Some metal bands quad track by recording four guitar parts, and pan them accordingly to produce a much fatter sound. Try this for yourself and experiment with your guitars and see what sounds you prefer.
Conclusion
Recording guitar at home can be daunting at first, but once the basics are mastered you are well on your way to creating professional and killer sounding tracks.
This post has guided you with the hardware and software needed with DAW tutorials, with useful and helpful tips for recording metal guitars. Hope you enjoyed the post!
