The 7 Best Amp Simulators For Bass (Free & Paid)

Recent Posts

What Are Pedal Platform Amps – Complete Guide 2022 


Guitarists have played proverbial volleyball with the term ‘pedal platform amp’ for quite some time. But what exactly is a pedal platform amp? Look no further! 

This ultimate guide is your resource to pedal platform amps. You will learn everything, including their characteristics, function, pros, cons, and the top reasons to diverge towards one. 

Let’s get started with a quick answer…

What is a Pedal Platform Amp? 

A Pedal platform amp is a term used to describe a guitar amplifier that optimally responds to guitar pedals – especially gain-based pedals. Therefore, a pedal platform amp functions as a platform to build a guitar tone around stompbox pedals, relying less on the amp’s natural distortion and effects. 

First, it’s helpful to know that ‘pedal platform amps’ are not a new innovative type of amp technology. 

It’s actually a ‘term’ recently coined by players to describe an amp (new & old) as the perfect platform to craft a unique sound using stompbox pedals.

As stompbox pedals are excitingly evolving and becoming a firm staple in rig setups, it makes sense to know if an amplifier takes pedals well; hence the term ‘pedal platform’ was born.    

In a way, a pedal platform amp functions similar to a PA system – projects the sound of your pedalboard. Rely less on the amp’s natural tone and distortion and more on your pedals to supply your custom sound.

This serves as having your perfect rig at your feet rather than relying on your amp’s natural distortion and effects. 

But what characteristics make an ideal pedal platform? 

The perfect pedal platform amp is typically valve-powered with a near-colorless tone. These two specific attributes function as a blank slate to add your desired color and flavors using pedals. 

As tube/valve amps specifically react super well to pedals, it highlights their dynamics and tonal qualities. Secondly, their lightly colored tone offers a clean voicing for pedals to shine as some amps ‘heavily color’ the tone with their unique sonic signature.  

Elements For An Awesome ‘Pedal Platform’ 

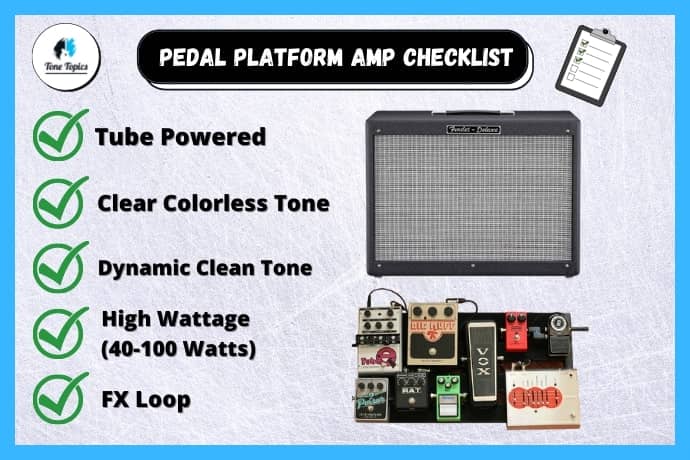
Tube-powered, plenty of headroom, pristine tonal clarity, and high wattage are some of the main characteristics of a pedal platform amp. Additionally, an onboard effects loop is a must. 

Let’s go into more detail. 

1. Tube/Valve Powered

There’s a myriad of reasons why tube amps are uncontested when it comes to the perfect base for a pedal platform amp. 

Their organic, smooth, and purer tones are unrivaled when offering an organic base for pedals to shine. Tube amps in their nature offer more in terms of clarity and responsiveness. 

Hence why distortion, overdrive, and fuzz pedals react incredibly well to a tube amp’s organic signature.

Tube amps ‘work harder’ when their pre-amp tubes are driven with either drive pedals or more volume. For this reason, tube amps bring out the best frequencies and tones from pedals. 

Modulation and time-based effects respond remarkably well, thanks to a clear and colorless voice for allowing them to shine brighter. Responsiveness is one of the core elements of tube amps, which is why they make the best pedal platform amps.  

2. Clear & Colorless Sound 

A clear, colorless voice booming from your amp allows pedals to shine and ‘show-off’ their unique tonal qualities.

A pedal platform amp functions as a blank canvas; the paintbrushes are your pedals to paint a unique tonal picture – creating your perfect rig masterpiece. Therefore, you should choose an amp with the cleanest and purest voiced signal possible. 

An amp with a naturally heavy colored signal essentially ‘masks’ the ‘true sound’ of your pedals – especially gain and distortion-based pedals. That’s because an amp that break-ups and ‘clips’ will essentially ‘blend with your pedals,’ blunting their ‘true frequencies.’

But keep in mind that all amplifiers will add a bit of color to the signal – some more so than others depending on the brand, pre/power tubes, speakers, and notably how the amp is voiced.  

With that said, there is no right or wrong to this approach. Some players prefer to hear a ‘blend’ of both pedals to achieve a ‘mash’ of both tones in harmony whereas some players simply adopt the amp solely as a big clean channel.

Speaking of the clean channels when determining a good pedal platform, a good place to start is usually the clean channel (if it’s a dual-channel amp.)

An amp’s clean channel is naturally more compressed than ‘drive’ channels, allowing tones to sound more articulate and organic, offering the perfect base to build a sound with an army of pedals. 

3. High Wattage = Tons of “Headroom” 

A requirement for the perfect pedal platform is one that can remain clean and distortionless at higher volumes.

As pedal platform connoisseurs like to adopt a sparkling clean tone but ‘step on’ an overdrive, distortion, or fuzz pedal as their source of roaring distortion, an amp with enough headroom is, therefore essential for an ideal pedal platform. 

We can define ‘headroom’ as space before your tone hits its ‘head’ on the proverbial ‘ceiling.’ Consequentially, when this happens, the amp begins distorting and ‘breaking up,’ like a child would on such an occasion. 

More specifically, when a tube amp’s volume reaches a certain threshold, it begins to ‘clip’ and ‘break up’, producing the crisp sound of sweet distortion.

This means that an amp with more headroom will remain clean and ‘distortionless’ at higher volumes. In a nutshell, the term ‘headroom’ is the amp’s ‘threshold’ or ‘ceiling’ until crossed, begins to ‘break-up,’ distort, and saturate.

Headroom Explained Video

What indicates an amp’s headroom space? Headroom is mainly influenced by the amp’s wattage power.

For example, a 20-watt tube amp will begin to break up sooner than a 60-watt tube amp on identical volume levels. The 60-watt amp, therefore, can project a pristine clean tone at louder volumes. Hence, the ideal pedal platform amp typically has a wattage of 40-100 watts of tube power. 

In a way, the amp is adopted as a PA system, merely projecting a clean and colorless sound for then drive pedals to provide the dirt and specific effects as the ‘icing on the cake.’

4. Effects Loop / (FX loop)

Widely considered one of the core features of all pedal platform amps. The effects loop (or FX loop) allows your modulation and time-based effects to bypass the pre-amp stage of your amp. 

If you are unaware, the pre-amp stage is what colors your guitar signal. It’s the location where all amps contain all their juicy character and tonal personality. In other words, It’s responsible for why all amps sound different from one another. 

With that said, modulation and time-based effects sound better with a clear and transparent signal flowing through them, allowing them to project a more organic and truer tone. 

Therefore, the effects loop connections (send & return) located on the back of the amp allow your modulation and time-based effects to bypass the pre-amp section.

This translates to less unwanted color, resulting in a more organic and pure representation of the pedal’s tone.  

FX Loop Explained Video

Now, an amp without the FX loop feature cannot route signals away from its pre-amp, meaning that it simply amplifies whatever is ‘sitting’ in front of it.

The pre-amp section will color your modulation and time-based effects – which is unwanted. As these effects sound better with a clean and colorless signal. 

The FX loop serves a very simple purpose: to transform an amp that would otherwise be a terrible pedal platform amp into one fit for the job of allowing your pedals to flourish.  

Amps to Avoid as a Pedal Platform 

Solid-State (Avoid)

Solid-state amps are beloved by many guitarists. They are incredibly versatile reliable and offer a palate of tones with minimal outboard gear. Unfortunately, they make poor pedal platform amps for a few reasons. 

The first is that, where tube amplifiers use valves, solid-state amps use electronic transistors as their amplification source. 

Because of this, pedals do not respond as well with solid-state amps. The familiar observation is that pedals tend to sound unreactive, lacking a ‘frequency response,’ and are somewhat flat. 

The second point relays back to color and clarity. Solid-state amps possess a naturally colored and somewhat ‘processed’ tone, offering minimal room for pedals to squeeze through. 

For example, a common aspect is that clean channels with solid-state amps can sound ‘warm,’ ‘fizzy’ and ‘lifeless.’ They are not as dynamically rich and responsive compared to tube amp’s clean channel, which, as discussed, is a ‘make or break’ requirement from a suitable pedal platform amp.

Even a 100-watt solid-state amp clean channel sounds overly compressed and unnatural at high volumes. They also tend to have an unbalanced sound which serves as a shaky foundation to build a tone around pedals. 

However, all of this is subjective as players argue that some solid-states react better than others.

Modeling Amps (Avoid)

Just like its name implies, a modeling amp is ‘modeled’ after a pre-existing amp and was built to mimic its tone as truthfully as possible. 

While attempted to ‘copy’ the achievements of their contemporaries decades ago by using similar parts, modern-day technology and advancements in digital realms have made modeling amps so ‘authentic’ that it’s frightening.  

Saying that modeling amps are heavily colored is a huge understatement.

Their tone is almost exactly the same as the tone they were modeled upon, meaning that you won’t have that blank slate to paint your own picture. You’ll have someone else’s painting and your own pencils and brushes to make it different.  

Using an Amp as A Pedal Platform (Pros & Cons) 

Pro 1# – Allows Pedals to Shine 

All amps, save for custom-made ones designed for collectors and professionals, offer limited tonal versatility.

You’ll need pedals to make their tone your own. Using a pedal platform amp is the best way to do it, as they will shine their brightest when plugged into one.  

Whether it’s the amp’s setup, the cleverly designed FX loop, the pristine clarity of its ‘clean’ channel, or all of the above, pedal platform amps are amplifiers that will allow your pedals to express their full character and grace your tone with unhindered dynamics.  

The warm, smooth, clean tone of a tube amp is the perfect starting point, upon which you can build an array of unique tones and sounds with effect pedals.  

Pro 2# – ‘Cherry-Pick’ Your Favorite Tones 

Another advantage of using your amp as a platform for pedals is that it allows you to get super precise with your sound.

Thousands of stompbox pedals boast their own unique and exquisite tone. With seamlessly unlimited tones on offer, it means you can get super detailed to the ‘exact’ individual sounds that make up your ‘dream rig.’ 

For example, from the vast selection of distortion pedals, each distortion pedal brand and model sounds inherently different, varying from aggressive, subtle, smooth, or mimicking the tones of specific amplifier brands. 

It’s the same story with all categories of effects including modulation, time-based effects, dynamic effects, and more.  Each pedal provides its own ‘tonal twist’ and ‘stand-out’ features. Whether certain pedals are to your tastes and worth including in your rig is up to you. 

Hence, the advantages of pedal platform amps are that you can ‘cherry-pick’ your favorite tones from each pedal. Once more, it allows you to build a custom and personal tone from the ground up – you select the building blocks of your tone. 

Solid-state amps are a tad rigid in this regard. For example, if you do not like the core sound of the onboard effects (let’s say chorus effect in this example), well, unfortunately, you are stuck with it; unless you supplement with an outboard chorus pedal. However, this kinda defeats the object of buying a solid-state amp. 

Pro 3# – Pedals Offer Unlimited ‘Tone-Tweaking’ 

This is arguably one of the biggest advantages of building a sound comprised of individual pedals as some solid-state amps can present very little in terms of intricate tone tweaking. 

For example, reverb parameters on most amps are pretty basic at most. Typically, you can only tweak the ‘wetness’ and ‘depth.’ 

A reverb pedal (let’s say the “TC electronics Hall of Fame 2,” offers multiple reverb types: (spring, hall, church, plate, room) along with ‘tone’ ‘pre-delay,’ ‘decay,’ and ‘master-level.’ 

As you can see, building a tone around pedals offers ultimate tone tweaking to get super intricate with each element of your rig. Obviously, pedals tend to offer many dials and parameters with each effect pedal – especially the advanced ones. 

Let’s take another example, the sound of an amp’s ‘core distortion’ is pretty much ‘set-in stone’ and ‘rigid’ in customization. This is because the ‘voice’ of an amp’s distortion is determined by the pre-amp section. 

In comparison, distortion pedals can provide separate 3-band EQ, ‘boost function,’ and with more advanced models – their own individual channels.

This means that you can ‘shape’ and ‘sculpt’ the exact sound of the distortion you want to hear from your amp. Better still, each model of drive pedals brings forward a different ‘spin’ and sonic signature.  

The point is building a sound around pedals presents a further intricate and customizable experience for dialing in your perfect guitar tones. 

Cons of Pedal Platform Amps

Con 1# – Expensive Rig 

Most guitar players get bitten by the ‘pedal bug’ at some point. As soon as you see the impact one pedal can have on your amp, you’ll probably start to wonder what a different effect will sound like. 

Before you know it, you’ll have spent a hefty sum of cash, thanks to your quest for additional tones as an individual pedal can range from…

  • Budget Stompboxes – $25 – $50
  • Mini Pedals – $50 – $90
  • Mid-Tier Stompboxes – $80 – $120
  • High-end brands –$100 – $200
  • Boutique stomboxes – $200+

It means that even assembling a measly-sized pedalboard (let’s say 6 pedals) can get expensive quickly. You will also require a pedalboard (to house your pedals), mini cables, and the 9V power source to power each pedal.

Also, the best pedal platform amps are obviously tube-powered. It goes without saying, tube amps are innately more expensive than most solid-state and modeling amps.

Therefore, assembling an army of pedals plus getting hold of a decent tube amp is an expensive investment compared to this solid-state and modeling amps as an all-in-one solution.

Con 2# – Tube Amps Can Be Unreliable 

Tube amps require maintenance and overtime tube replacements. They can be unreliable because you never know when a tube will blow out.

You may be home, ready to replace the broken part at a moment’s notice, or you may be playing the gig of your life, hoping that won’t be the case.  

Valve amp tubes aren’t flimsy per se, but the smallest of bumps as you’re carrying your amp from one place to the other can shorten their lifespan. Or, in the worst scenario, shatter the precious tubes as they are made from fragile glass.  

Furthermore, new owners of tube amps are sometimes too impatient to start playing, not allowing the tubes to warm up, which is also one of the common cases where they don’t last long.  

Con 3# – Not the Best for Beginners 

It usually takes years of experimenting before you can form a picture of what your pedalboard should look like.

Most beginners will be happier playing a solid-state (or modeling) amp. They’ll already have various integrated effects and presets to experiment with and enjoy. 

Furthermore, tube amps are pricey, as they should be. They generally sound the best, even aside from being the best pedal platform amps. 

As a side note, I believe beginners should choose digital effects due to the vast tonal diversity. Therefore, I have an awesome post detailing the pros and cons of multi-effect pedalboards and individual stompbox pedals. You should read this awesome guide to learn the important differences.

Con 4# – Requires Some Tap Dancing 

A pedal platform amp relies heavily on pedals to offer the tones and flavors. However, the age-old problem with a pedalboard crammed full of pedals is that efficiently switching to different tones requires some tap dancing.

More specifically, you can only activate/deactivate one pedal at a time. Obviously, because you only have only one foot. 

For example, during a solo, it is impossible to engage an overdrive pedal, reverb, or any other effect to let it ‘jump out’ in a band mix during a live performance. 

The solution would be to invest in a device known as a ‘pedalboard switcher.’ I detailed these devices in a previously written article called ‘how to activate multiple guitar pedals at once.’ I encourage you to check this article out.

Nevertheless, a pedal switcher is a separate device that essentially ‘syncs’ with all of your individual stompbox pedals.

Allowing you to create ‘patches’ of your pedal, which compresses all of your complicated pedal changes into one single pedal switch. A heavy pedalboard set-up makes changing to different tones more cumbersome without one of these devices.  

Who Should Choose a Pedal Platform Amp? 

  • Players who want a detailed and custom rig with pedals.
  • For pedal connoisseurs who love and collect pedals. 
  • Players who prefer the customization benefits of pedal distortion. 
  • Players who are ‘choosy’ with amp distortion. 
  • Players who love collecting pedals.
  • Intermediate or advanced players. 
  • Players that love dynamic tube amp clean tones.  
  • Players that don’t like the ‘core sound’ of most solid-state amps. 

Related Posts

Fender Jazz Bass Controls (Explained)


The Fender Jazz Bass has been at the echelon of the rhythmic bass arsenal for over five decades now.

Whether it’s the traditional stacked controls on your Jazz bass or the three-knob layout. You should always start by learning what each pickup offers and its tonal functionality.

That’s why in this post, I’ll break down in detail the controls on a J Bass guitar and each pickup’s function. Let’s get started.

What do the knobs on a Fender Jazz bass do?

The modern Fender Jazz bass has three basic controls. The knob closest to the neck controls the volume of the neck pickup (warmer tone.) The knob closest to the bridge pickup controls the volume of the bridge pickup (brighter tone.) The knob closest to the input jack adjusts the master tone of both pickups.

Jazz Bass Controls – What They Do?

Primarily, the neck and bridge pickup knobs function to ‘blend’ the amount of volume for each pickup. Whereas the tone knob serves as a master tone. Now let’s look at each knob more closely…

(1.) Neck Pickup Knob – (Closest to the Neck)

On a Jazz bass, the neck pickup is positioned close to the fretboard. Meaning the neck pickup captures ‘warmer’ and ’rounder’ tones.

Therefore, increasing the neck pickup volume, the tone becomes increasingly deeper, rounder, and less defined.

Like on any bass, the neck pickup knob adds warmth, fullness, and less articulation.

You will notice the more volume you add with the neck pickup, the tone becomes rounder and deeper with less ‘bite’ and ‘snap’ when plucking with a pick.

Blending maximum low frequencies combined with minimal volume from the bridge pickup offers a super deep tone. Ideal for ’round,’ deep, and smooth bass lines (especially when plucking with the fingers.)

Now, as expected, the more you turn up the knob, the more prominent these qualities become. In other words, the more volume from the neck pickup, the ’rounder,’ ‘deeper,’ and less defined the bass sounds.

With a well-managed neck control, you can expect to set the basis of your bass sound. Be it mellower or simply enhancing the low-end presence.

(2.) Bridge Pickup Knob – (Closest to The Bridge)

In contrast, The bridge pickup is positioned closest to the saddle. Meaning the bridge pickup captures ‘brighter’ and ‘thinner’ frequencies.

Therefore, turning the bridge pickup knob clockwise makes the tone brighter and more defined. Adding more ‘attack,’ ‘bite,’ and ‘punchiness’ to the bass signal.

The bridge pickup is set to make the presence of your Jazz bass a punchier one by stressing the high-frequencies. It spikes the contours of your mix, providing brightness, treble, and a ‘cutting element.’

The bridge pickup knob is key to adjusting how bright, punchy, and cutting you want your bass tone to be.

For example, Slap bass players love maximum volume from the neck pickup. Because a bright and articulate tone optimizes the ‘snap’ and ‘poping’ tones of slap bass playing. Allowing the tone to sound defined and more percussive in nature.

(3.) Master Tone – (Closest to The Input Jack )

Since Jazz basses typically sport passive pickups, the single tone knob has a more specific function.

With passive pickups, the master tone knob focuses on adding or cutting treble frequencies from the overall tone.

Once your volume on each pickup is set, the tone knob controls the overall brightness/darkness of the signal.

In a way, the tone knob ‘fine-tunes’ the treble and bass frequencies from the overall signal.

With a maxed tone knob, you tend to get the air and fret noise that makes for a spankier sound. Treble makes everything brighter and more defined.

On the other hand, minimizing the tone knob gives a warmer and deeper feel to your overall sound. While it conserves the treble coming from your pickups, it diminishes the brightness and ‘high-end’ signal frequencies.

Jazz Bass Pickups – Are They Humbuckers or Single-Coils?

Jazz bass pickups have been, traditionally, single-coils. Fender was looking to offer a balanced tone with an enhanced attack and the possibility to provide an aired sound.

The single-coil has been the traditional option given its open sound with rich top-ends. Nevertheless, they balance out both frequencies to harmonize while capturing the string’s natural sound. This is thanks to their single coil of wire, responsible for this aired reception that picks up noise from outside.

A common misconception is that these pickups lack bottom-end. It’s simply focused on highlighting treble, enhancing attack and definition in a single piece. However, this latter quality enables you to control it by catching it.

On the other hand, Humbuckers are wired and configured to cancel external frequencies from beyond your strings, hence their name. It bucks the humming.

Since humbuckers are two single-coils reverse wounded together, they produce an overall hotter signal. This makes for a fatter-sounding midrange and bottom-end.

Do Jazz Basses Have Active or Passive Pickups?

The Jazz bass is synonymous with passive pickups, let alone the standard bass is. Up until 1970, passive electronics were the norm.

Every record had a passive bass on it, and thus the tradition stuck. On the other hand, Fender got really creative with the invention of active pickups, so they started making their own models.

Some of their most popular active pickup models include the Deluxe Active Jazz Bass and the P/J Hybrid Bass. Among the most popular.

Passive pickups have a rather appealing quality, their simplicity. Their natural warmth and more mellow sound can be shaped with two basic settings, tone, and volume. This is pretty much what most players need.

Now, passive pickups can seem a tad limiting to some fans, considering nothing is boosting your signal. So players with passive pickups tend to be more aware of tone embellishment from different sources. Be it pedals or amps, the passive choice is one for you to paint on.

On the other hand, active pickups offer a powered preamp, which gives players various tone alternatives from the bat. The other pro for an active setup is that the onboard preamp produces more output and gain for ‘hotter’ aggressive tones.

This certainly allows you to cut through the mix with more edge and tonal superiority, but there is one downside. Active pickups and basses require 9V batteries at all times, mainly because the preamp needs it to remain functional.

The 7 Best Orange Amps for Home Use (Review Post) 


Orange Amplifiers! Bright, bold, British, and famed for brilliant crunch tones. 

But what about their selection of bedroom amps?    

This post will delve into Orange’s catalog of amps perfect for home use. Assisting you to make a choice on your next amp.   

First, let’s inspect my practice amp buying guide. 

Practice Amp Buying Guide 

Know Your Desired Features

First, you should distinguish whether you will utilize your Orange amp as a ‘strictly practice at home amp.’ 

If yes? This means you require a small combo amp with low wattage and lots of valuable features, such as a headphone connection and built-in effects. 

On the other hand, If you want a practice amp that also has the tools and capability for playing rehearsals and gigs.

Then you will want something bigger, higher wattage, and an attenuator to ‘knock down’ the volume back to playing more suitable bedroom volumes.  

  • Effects – Reverb, Delay, Flanger, etc. – who needs a pedalboard? 
  • Built-in tuner – For quick tuning ‘on the fly.’ 
  • Headphone Connectivity – Perfect for silent late-night practice 
  • Aux connection – To hook up an external audio source for playing backing tracks
  • Small Footprint – For saving space in your bedroom 
  • Attenuation switch – To ‘knock down’ the volume potential

Choosing The Correct Wattage For You

If you’re a beginner, you can translate ‘wattage’ to the amp’s ‘volume potential’ More accurately speaking, the higher the wattage allows the amp to reach higher levels of volume without distorting, known as ‘headroom.’ 

A lower wattage is the ticket if you want something strictly for home use. On the other hand, if you want something for practicing and potentially gigging? You will need something with more oomph. 

Here are some handy wattage ranges so you can pinpoint the correct wattage for you. 

Wattage Ranges 

  • Practice at Home Amp – 10W-50W (Solid-State Amp)
  • Practice and Gigging – 50W+ (Solid-State Amp)
  • Practice and Gigging – 15W+ (Hybrid Amp)
  • Practice and Gigging – Minimum of 15W (Tube Amp)

Combo or Head

Combo amps are undeniably preferred for home practice; you’ll have the benefits of a head with a built-in cabinet ready to go. Secondly, this makes them cheaper than a head + cabinet combination saving you money in the process. 

Whereas an individual head certainly looks cool. However, you will need to pay more dollars for a speaker cabinet to hook it up to. For this reason, as a practice at home amp, combos are typically the way to go. 

Orange Crush Mini 3W – Best for Beginners 

Orange’s Crush Mini is a tiny and basic practice amp that packs useful features into something so small.

The Mini Crush features 3 watts and is the quietest and simplest model on the list. The amp is clearly designed for bedroom practice, busking, warming up backstage, and roaming around the house. The Mini Crush sports a 4-inch loudspeaker that projects its tone surprisingly well for a mini amp.

Searching for usable tones is fairly easy; Mini Crush sports tone, volume, and gain controls providing you with simplified tone-shaping options at the expense of sonic versatility.

It’s got a headphone port for silent practicing and can support an external speaker of 8 Ohms. Both aux input and speaker ports are located on the back.

Orange Crush Mini is also outfitted with an integrated tuner, which is useful for rapid tuning adjustments on the fly.  

Features

  • 3 Watts
  • Integrated Tuner
  • Back-mounted Speaker and Auxiliary ports
  • Front-mounted headphone port
  • Volume, tone, and gain controls
  • 4-inch loudspeaker

What We Liked 

Everything about Mini Crush corresponds to its price tag. It’s a small, portable amp that will deliver you the classic Orange tone at a highly approachable price.

Portability and affordability aren’t the main benefits of using Mini Crush – its compatibility with external speakers and headphones is. 

Its weak wattage is compensated for by its ability to be paired with stronger speakers and cabs. On the other hand, 3 watts are all you need to practice in your room, so the option to buff its output with a cab is a huge plus for musicians wanting a bit more volume projection.

Mini’s onboard controls are somewhat limited in terms of versatility, but they’re very easy to use. If you are a beginner, the ability to find basic tones and add crunchy gain with a single knob is priceless. 

What We Didn’t Like 

The Orange Crush Mini 3 watts are basically only suitable for home practice, which is only a benefit to beginner guitarists living in a quiet environment. Players can connect it to an 8-ohm cabinet; its speaker output is located on the back.

Rock and metal players need to know that gain and distortion typically sound ‘fuzzy’ with tiny amp speakers.

Additionally, its cleans sound somewhat plastic and bland at low volumes. Finding the “golden middle” sound-wise may be a bit more difficult for beginners; fortunately, this amp is very simple to use, so tackling its learning curve shouldn’t be too hard for anyone. 

Pros 

  • Smallest amp in the Orange Crush series
  • Ultimate portability
  • Can transform into an amplifier head when connected to a cab (via speaker out)
  • Integrated tuner
  • Simple to use

Cons

  • A fairly limited selection of features (no effects)
  • Fuzzy gain and distorted tones

Best For 

If you’ve just set your feet into the world of guitar playing, the Crush Mini may be the best choice for you. It is very cheap, portable, and sounds decent for the money. The integrated tuner and speaker cab connectivity add certain value.

Orange Crush12 Combo Amp – Best for Under $100

Orange’s Crush 12 is a stronger contender than its Mini brother. It’s got a bigger 6-inch speaker for wider sound projection with additional EQ dials for sculpting tones.

Being a 6-inch speaker, it’s a highly portable amplifier that is perfectly suited for home practice and use with additional guitar pedals. 

This guitar amplifier features a highly responsive 3-band equalizer that allows you to chase a decent range of tones while still being very simple to use. 

With both overdrive and a dedicated gain knob, Crush 12 is an excellent choice for beginners in heavier music genres.

Its cleans are pretty warm and solid, although they aren’t pristinely clear. The six-inch speaker Crush 12 is equipped with projects the 12 watts phenomenally well overall. 

Features

  • 12 watts
  • 3-band EQ
  • Gain and drive knobs
  • 6-inch speaker
  • Headphone out

What We Liked 

A 12-watt amp is all you need to learn the ropes if you are a beginner. 

Additionally, distorted tones sound better on louder amps; if you struggle to find proper-sounding ones on a Crush Mini, you will certainly be able to do so on Crush 12. 

The separate gain and drive knobs allow for more versatility while chasing a bigger spectrum of sounds tones, you with additional fine-tuning options. 

Overall, it’s a pretty well-rounded amp that delivers surprisingly great distorted sounds from something so small. The amp delivers an aggressive, distorted tone that is ‘bitey’ and ‘rough,’ excellent for all rock genres. Whereas, using it from metal, you may want a distortion pedal for more saturated tones. 

What We Didn’t Like 

While performing solidly in more than a few fields of performance, Crush 12 is still a budget home amp. 

You could get a much stronger combo or a better amp head from the Orange series with a few extra bucks. 

Just like Orange Crush Mini, Crush 12’s clean performance is not absolutely perfect. A tiny buzz at low volumes becomes more noticeable the higher you go. Although it’s not a fatal flaw, playing jazz or blues with unwanted noise may become an issue. 

Pros 

  • Surprisingly good tones from a small amp
  • Decent wattage for home practice
  • Versatile tone controls 
  • Very affordable 
  • Simple to use
  • Portable

Cons

  • No speaker out, meaning can’t connect it to an external cab
  • Clean tones leave room for improvement 
  • No onboard effects 

Best For 

Orange Crush 12 is best-suited for serious beginners after a solid ‘practice at home amp.’ This option offers an affordable price with a nice spectrum of available tones from something so small.  

Orange Crush 35RT – Best Tonal Versatility and Affordability

Orange Crush 35RT is the entry-level heavy hitter of the series. It’s the “smallest” powerhouse in the Crush line. Sporting 35 watts, a custom 10-inch speaker, two selectable channels, and an array of features geared towards chasing different tones. 

The dual-channel design allows you to seamlessly switch between cleans and whichever color you’ve set the second channel.

This is precisely what sets Crush 35RT apart from other models on the list; it rocks a 3-band EQ and individual gain, clean, and dirty tone knobs, in addition to the built-in reverb that can also be controlled with a separate knob. 

Crush 35RT gains a much different voice by flipping the channel switch, which you can fully customize with provided controls and knobs. It also sports a neat integrated tuner for speedy tuning adjustments. 

Features

  • 35 watts
  • Buffered FX loop
  • Twin channels
  • True analog signal
  • CabSim feature

What We Liked

One of the greatest things about Crush 35RT is the CabSim. Basically, this is an authentic cabinet simulator that mirrors the tone of a microphone-wired four-by-twelve cabinet. This feature is only usable with headphones or recording consoles.

The buffered FX loop is another great feature that allows 35RT to accept dozens of guitar effects and pedals without losing an ounce of its original tone. Needless to say, this, combined with its 35 watts, yields a perfect combination for live gigging. 

This amp is equipped with a big, custom VOTW speaker and sports two separate channels that are fully customizable with various tone and effect controls. Its tonal versatility is through the roof. To top it all off, 35RT is more than affordable for what it does and offers. 

What We Didn’t Like

There’s hardly anything not to like about Orange Crush 35RT, but there are a few things that leave some room for improvement. 

Namely, the Dirty channel adds variety, but it contributes little to players who know what they’re looking for. 

Its overly fuzzy tone may be great for experimentation, but it’s too undefined and arguably unrefined for conventional genres of music. If you’re into drone metal, avant-garde rock, or some deeper sub-genres of progressive music, you’ll probably like it, though. 

Although this is not exactly a drawback if you’re new to Orange amps, the fact that the power button is placed on the back is confusing to players that have grown accustomed to it being mounted on the front. 

Pros 

  • Outstanding tonal versatility 
  • Switch between cleans and distortion with a flick 
  • Strong enough for medium-sized gigs, perfect for smaller venues
  • Decently simple to use

Cons

  • Back-mounted power switch
  • Dirty channel is quite impractical to use in conventional music styles
  • A bit too loud for home practice 

Best For

The Crush 35RT is arguably the best home practice amp by Orange. It’s equipped with tons of features and ticks all the boxes a beginner or intermediate player wants in a practice amp. Great tones, effects, and versatility, all in a straightforward amp. 

Orange Micro Terror Head – Most Portable Head

the Micro Terror Head is the little brother version of the iconic tiny terror series by Orange. 

It’s equipped with robust 12Ax7 tubes, convenient foot stabilizers, and 20 watts of unbridled strength, alongside headphone out, aux input, and a simple 3-band EQ. 

It’s a remarkably portable amp head that weighs under 2 pounds and is barely above 6 inches tall. This basically means that it’s simple to haul to and from gigs. 

Speaking of gigging, it is possible to gig with the Micro Terrors 20-watt power. With a big enough cabinet and miking system to the venue’s PA system.  

Engineered for musicians with attitude, Micro Terror offers a strong, recognizable sound at the slight expense of versatility. Without a dedicated onboard equalizer, you will only have the Tone knob to shape your guitar’s voice, which is still more than enough when handled by experienced hands. 

The Micro Terror comes in two versions, the ‘original’ and ‘Dark Terror’ versions. What’s the difference? The Dark Terror contains additional gain and tighter low-ends suited for saturated and tighter metal tones.  

Features

  • 20-watt amp
  • 12AX7 tubes 
  • Volume, tone & gain knobs
  • Headphone output
  • Auxiliary input 
  • Built-in handle

What We Liked 

Most amp heads aren’t too practical in terms of transport, but Micro Terror seems like it was specifically designed with convenience in mind. Not only is it light and tiny in size, but it also features a built-in handle that will help you carry it to your gigs and band practice without breaking a sweat. 

With 20 solid-state watts, the Mini Terror will easily beat much stronger amps in a contest of loudness. Its clean tones are much better and pristine, while it packs quite a punch in the heavy department as well. 

The clunky plastic legs of early Orange amps were replaced with anti-slip foot stabilizers that prevent Micro Terror from tipping, meaning you can put it on top of a cab and forget about it. 

What We Didn’t Like 

Clearly, the Micro Terror aspires for portability rather than a wide array of tones. With that said, very few EQ dials limit its tone sculpting options.  

Its simple controls are great for newbie players, but it’s just too basic in terms of tonal versatility. With most amps, you’ll have at least Bass and Treble knobs; with Micro Terror, tone, gain, and volume are all you’ll get. 

Pros 

  • Outstandingly simple to use
  • Incredible portability
  • Lightweight and petite
  • Non-slip stabilizer legs prevent it from tipping

Cons

  • Minimal tonal versatility 

Best For 

Bluntly put, Micro Terror is perfect for the practicing and rehearsing player who wants a super portable amp with great tones to play alongside a drummer.

It’s also for the minimal guitarists who want a simple amplification source with pedals. It’s not the best’ beginner amp’ as it lacks so many essential features compared to other selections on this list. Its portability and volume level for something so tiny is a huge standout.

Orange Tiny Terror Head – Best Mini Valve Amp Tones

The Tiny Terro series by Orange pioneered the ‘lunchbox amp.’ small, loud, portable but also very usable for home use. 

You shouldn’t underestimate Tiny Terror’s 15 or 7 watts because valve amps are much louder than solid-state ones. 

If this doesn’t make much sense, this amp has switchable wattage, meaning it can transition down to a more ‘bedroom friendly’ volume without losing gain saturation and dynamics.

This amplifier is outfitted with EL84 and 12AX7 tubes, which warm up quite quickly and deliver a firm, robust sound. Unlike Crush Mini or Crush 12, Tiny Terror will present you with impeccable cleans and excellent gain tones regardless of volume or wattage. 

It is a simple single-channel amp head with a 3-band EQ at its core. Tiny Terror Head is an easy-to-use amplifier that can accommodate your practicing needs; with the right gear, it’s a monster for band rehearsals and live gigs. 

In terms of tonal versatility, Tiny Terror mirrors the capabilities of Micro Terror. Both are equipped with the same equalizer settings and controls. However, Tiny Terror features different tubes and has a distinct sonic signature. 

Features

  • Switchable 15/7 watts
  • Two EL84 Tubes, two 12AX7 tubes
  • 3-band EQ
  • Steel housing
  • Built-in handle

What We Liked

We loved the portability of Micro Terror, but Tiny Terror adds another layer of practicality to an already-awesome amplifier.

The switchable wattage is a game-changing feature that allows guitarists to quietly practice at home (even without headphones) and to be decently loud during band practice. 

Amp heads are meant to be fitted to cabinets, meaning that if you have a decent speaker, you can use Tiny Terror for live gigs easily.

What’s more, it’s remarkably portable and packs a built-in handle for simplified transport. It’s also a beginner-friendly amp considering it only has three tone control knobs. 

What We Didn’t Like

Regardless of how great its gain-driven tones sound, you probably won’t be too thrilled about Tiny Terror’s tonal versatility. 

While it’s a good choice for bedroom practice, you’ll need a good cabinet and at least one tone-defining effect (reverb) to utilize its benefits properly. 

Pros 

  • Switchable wattage
  • Simple controls
  • Superb portability 
  • Excellent tone quality

Cons

  • Fairly limited when used as-is
  • Low tonal versatility
  • Somewhat weaker than most similarly priced guitar amp heads

Best For

What’s great about Tiny Terror is that you can use it for practically anything. It’s a bedroom/recording amp on 7 watts, a band practice amp on 15 watts, and it’s a gig-ready amp with a big cabinet beneath it. It’s also a great choice for recording musicians, as its tube-powered sonic signature is absolutely fantastic. You’ll need to gear up on mics, cabs, and pedals to reap these benefits, though. 

Orange Super Crush 100 Combo – Best for Practicing and Gigging

One of the strongest Orange models in the Crush line, the Super Crush is a sturdy, dependable powerhouse amp. 

The sound of a Super Crush is crisp and robust, and the fact that there are two channels on board means that you can toy around with its tone indefinitely. 

Unfortunately, Super Crush does not offer written explanations on its control panel, so most beginners will have to guess what each button does. 

The controls for the clean are volume, bass, and treble, respectively, while the dirty channel controls are volume, treble, middle, bass, and gain from right to left. 

The last two controls are reverb and volume. 

Most Orange amps on the list are outfitted with custom VOTW speakers, while Super Crush features Celestion’s 12-inch one. 

With greater output power comes a much bigger and heavier box to contain it; Orange Super Crush weighs nearly 40 pounds, and it is roughly 18 inches tall and 22 inches wide. Additional features include the headphone-accessible Cab Simulator, the buffered FX loop, and integrated digital reverb. 

Features

  • 100 watts
  • Two channels
  • 3-band clean, 5-band dirty channel tone controls
  • Built-in handle
  • Integrated digital reverb
  • Buffered FX loop
  • Headphone-accessible Cab Simulator feature

What We Liked

A hundred watts of pure, unrestrained power is, by far, the one thing that most Super Crush owners were and still are excited about. Furthermore, its 100 watts actually sound absolutely fantastic, and according to some, almost as if Super Crash was a tube amp. 

The buffered FX loop is an excellent feature that allows you to wire as many pedals as you want, which is particularly important for a gigging amp. 

Furthermore, Super Crush features two channels that you can fine-tune to perfection with a total of eight control knobs. 

What We Didn’t Like

Obviously, Orange Super Crush is not the most portable amp in the world. It’s a heavy-hitting heavyweight champion of the brand’s strongest amps; its built-in handle helps a bit, although you’re most likely to haul it to gigs and band practice the old-fashioned way. 

In terms of storage, you’ll need a decently-sized space to keep it; Super Crush may not fit into smaller car trunks. 

Its biggest flaw, though, is the lack of written descriptions of its tone controls. Aside from the “booming speaker,” most pictures tell very little to people who aren’t well-versed in Orange amps. You will get an instruction manual, but most people won’t read it. 

Pros 

  • The strongest amplifier in the Crush series
  • Exceptional tonal versatility
  • Two channels with separate control knobs
  • Amazing sonic signature

Cons

  • Very large and heavy
  • Tone knobs are described with pictures only
  • Not the most affordable amp on the list

Best For

If you are a gigging musician, you will find great value in all of Super Crush’s features. It offers superb wattage, versatile tone-chasing options, a stable sound at high gain, and a variety of built-in extras, such as the buffered FX loop or Cabinet Simulator. 

It’s not perfect for home practice since it lacks the “sponge” attenuator; Super Crush is excellent for band practice, especially if your bandmates are also into playing loud. 

Orange Amplifiers Crush Pro CR60C 60W – Best Allrounder

By comparing all the features, drawbacks, and unique advantages of all amps on the list, the title of the best-rounded model goes to Crush Pro CR60C. 

In terms of strength, its 60 watts are much closer to Super Crush’s 100 than any of the weaker units. Versatility-wise, it is on par with 35RT and Super Crush; its tone knobs are also much better explained on the panel, unlike SC 100. 

Furthermore, Crush Pro CR60C features a 12-inch VOTW speaker; should it be too weak for the size of your live gigs, you can connect this amp to a 16-ohm cab and be loud enough to hit the back lines of an average-sized festival. 

Features

  • 60 watts
  • Two channels
  • 3-band clean, 5-band dirty channel EQ
  • Analog signal
  • Digital reverb
  • 12-inch VOTW Speaker

What We Liked

With great wattage, an eclectic array of tone controls, and separate clean & dirty channels, it would be an understatement to say that Crush Pro CR60C can do everything. 

From garage gigs to full-on festivals, you will sound loud and great while using it. It can also be a good option for bedroom practice at lower volumes, and you’ll surely want to show it off to your bandmates. Unlike weaker Orange amps, Crush Pro CR60C boasts pristinely clear cleans, and handles gain remarkably well. 

This amp was designed to accommodate agile players constantly shifting between recording songs, practicing new material, and performing. 

What We Didn’t Like

In all fairness, there’s not a single field of performance where Crush Pro CR60C is lacking. The only thing that you probably won’t be too thrilled about is that it weighs around 45 pounds, which is even more than the 100-watt Super Crush. 

Aside from that, its three-level built-in reverb is great, but you’ll need to buy the footswitch separately to use it onstage. 

Pros 

  • Excellent wattage 
  • Perfect for all occasions 
  • Great tonal versatility
  • Robust sound at all gain stages

Cons

  • Just a bit too heavy for comfort

Best For

Orange Crush Pro CR60C is always the correct answer, no matter the question. Its incredible wattage, tonal versatility, and sound make it the most competent amp in the Crush series. CR60C may be weaker than Super Crush, but it’s more beginner-friendly and equally great for live performances. With its versatile tone controls, Crush Pro CR60C is a perfect choice for band guitarists, recording musicians, and use in the bedroom. 

Should you Replace All Strings if One Breaks? (Solution)


So you have just broken a string (damn!) Pretty annoying? Even more so on a relatively fresh set of strings. 

So what should you do? Change all of them or replace the recently decapitated string? What’s the recommended solution?  

Luckily, this post offers a helpful guide on the solution to this ‘guitar dilemma.’ Let’s jump right in…

Should I replace all of my strings if one breaks?

When a string breaks, it makes sense to change all of the strings if they have been in use for some time and past their best in terms of brightness and dynamics. However, if you break a string on a fresh set? It makes sense just to replace the individual broken string. 

Now we have cleared that up, let’s dive deeper into the solutions. 

Breaking a String on a Fresh Set – (Solution)

If the strings currently on your guitar are pretty new. Let’s say less than a few weeks old with minimal use. Then it makes sense to replace the broken string with a new one.

The reason is newish strings have lots of life to give. More specifically, in terms of ‘snappiness,’ ‘brightness,’ and ‘dynamics.’ Also, There’s no reason to waste a relatively fresh set if they are only weeks old.

If you are not playing an important gig or recording in the studio with the guitar. In that case, replacing all of the strings is unnecessary.  

However, if your strings are relatively fresh and they break regularly? Then there might be something more serious in terms of your guitar’s set-up (bridge, nut, and other issues.) (I cover these issues later in the post.)

The biggest worry with players when replacing one individual string on a relatively fresh set is that the new string will sound uneven in volume, brightness, dynamics, and intonation. 

However, there won’t be any big differences in volume, brightness, and dynamics to speak of. That’s if they are all still pretty fresh. Therefore, you should purchase an individual string online or at a guitar store.  

Keep in mind you need to ensure you replace that string position with the same gauge. For example, replace the broken E string (gauge 10) with the matching gauge (gauge 10.)    

With that said, you should inspect how well used your current set of strings are. If they are pretty old and past their best? Then keep reading…   

Breaking a String on a Worn Set – (Solution)

The solution is much simpler when breaking a string on a well-used set of strings (let’s say around 1 month with regular use). 

The solution would be to replace all of them in one go. The reason is your strings require a change anyway. After all, strings break because they corrode away and become old and weakened from regular use. 

You can tell when your strings need a change if they…

  • Sound lifeless and flat
  • Sound dull in terms of dynamics 
  • Loss in brightness    
  • A build-up of dirt, grime, and rust 
  • Sound ‘off’ in terms of intonation 

When to replace strings is a ‘hot topic’ online. The general recommendation is to change strings every month if you play that specific guitar daily. 

So if you have broken a string on an already well-used set? Then the solution would be to replace the full set. 

After all, new strings will breathe new life into a guitar. They sound richer and brighter and boost your guitar tone’s dynamics. Plus, they feel much cleaner and stay in tune much better than a well-used set. 

Can You Apply Mismatched Gauged Strings? 

Let’s say you break your guitar’s G string (17 gauge). We’ve all been there! Unfortunately, let’s say you don’t have a spare G string. But do you happen to own a spare B string? 

Therefore, is it ok to apply mismatched gauge strings? 

Technically, you can, and it may be useable in the short term. However, it won’t be optimal in terms of intonation, playability, and tuning. After all, different gauged strings are designed to varying levels of thickness for a reason. 

The reason is that specific gauge strings are designed for the optimal tension they were intended for. For example, applying a spare B string to a G string means it will be under the required optimal tension. 

Likewise, applying a G string as a stand-in B string means it will be under excessive tension. Meaning that it will likely break and disrupt intonation and be unable to stay in tune.

Not only that, with mismatched gauges, you can encounter other unwanted issues such as ‘fret buzz,’ especially further up the neck. 

Knowing this, applying the correct gauged strings is best to avoid tuning, playability, and intonation issues.  

How to Prevent Breaking Guitar Strings 

Although very annoying (especially during a gig!) Guitar strings break for two reasons…

They corrode after heavy use, causing them to weaken and eventually snap. This is expected and just the norm with guitar strings (nothing to be concerned about here!)

With that said, if you continually break relatively fresh strings, let’s say under a week or two? Then, there may be a set-up issue with your guitar…

Guitar strings break (when moderately fresh) because the string is in contact with a sharp edge. This sharp edge can be in contact with either the bridge, nut, frets or a combination of all three. 

Sharp edges typically form (on the bridge and nut), known as burrs. 

Burrs are minute holes or imperfections that form over time due to the string rubbing against the transition surface, causing a small sharp point of contact. 

I would advise taking your guitar to a trained guitar tech to diagnose and remove any sharp contact points (nut, bridge, frets, or tuning tree.) 

Locate Where Your Strings Break 

The key is to identify the culprit is ‘where’ your guitar strings are breaking. The reason is that you can correct the string’s point of contact that is compromising the string’s point of transition. 

The Bridge/Saddle 

Arguably, the most common position that strings break is the bridge. The bridge serves as a smooth resting point of contact for your strings. 

If the bridge’s saddles are old and worn, minute burrs into the point of contact. This can likely cause the strings to break. The solution would be to file the bridge slots to offer a smoother resting point for the strings. 

The Nut 

Guitar nuts are commonly made from materials such as bone and metal. Similar to the bridge, they serve as a smooth resting point of contact for strings. 

A worn nut can serve as a rough surface for strings that form over time. A worn not can form abrasive edges that can snap and kink a string if it makes essive contact causing it to snap.  

The solution is to file the nut’s surface to achieve a smooth resting point for your strings. Removing any rough burs compromising a smooth transition point.  

The Frets 

The issue of frets is a less common reason for breaking string breaks, but it does happen. Frets are made from metal but can form minute burrs over time. Filing frets can be a beneficial solution to ensure they are smooth and an abrasive free point of contact for strings.  

The String Tree 

If you have locking tuners installed. Always ensure you have enough windings of the strings and don’t excessively clamp your strings into position. Excessively clamping the strings into position can form kinks and eventually cause them to break.     

Neck Pickup Louder Than The Bridge (Why? & Solutions)


Have you ever wondered why there’s a difference in volume levels between the neck and bridge pickup?

Is this ‘normal,’ and what can you do about it?

Luckily, my post will explain the neck and bridge pickup relationship in terms of volume. Also, I will offer my guide to solving uneven pickup output. Let’s get started.

Why does the neck pickup sound louder than the bridge?

With guitars in general, the neck pickup naturally sounds louder because it is mounted closer to the string’s peak vibrations giving it more output and volume. Secondly, the bridge pickup sounds brighter than the neck hence why it sounds brighter and less pronounced.

The long Answer

As mentioned above, it is very common for the neck pickup to sound louder than the bridge. So don’t fret about it (see what I did there!)

This happens naturally with electric guitars for a common reason.

Let me explain. Essentially, the neck pickup is positioned closer to the strings ‘peak’ vibrations resulting in a louder output than the bridge pickup. In comparison, the bridge pickup is positioned closer to the saddle where the vibrations are less prominent, resulting in a weaker output.

My handy graphic below demonstrates how string vibration affects the pickups’ output concerning their position on a guitar.

Why The Neck Pickup Has More Output/Volume

As you can see from the graphic, the neck pickup receives ‘stronger’ string vibrations which is why the neck pickup emits more output (volume.) Resulting in slightly more volume compared to the bridge pickup.

Furthermore, the neck pickup sounds naturally thicker and warmer, contributing to this audio illusion of increased volume when switching to the neck.

Hence why there’s no reason to scratch your head wondering why your bridge pickup sounds so ‘weak’ and ‘broken.’ This is just physics at work here.

Guitar manufacturers have understood this concept for a long time. Therefore, to compensate for uneven volumes between each pickup.

There are a few methods guitar manufacturers undertake to even out the volume between pickups…

  • Raise the height of the bridge pickup
  • Lower the height of the neck pickup

Or, wind the bridge pickup with additional copper coil as more copper wounds = more output.

The other practice is to add a ‘hotter’ ceramic magnet in the bridge pickup (hotter magnet = more output.)

Hoe to Fix Uneven Neck Pickup Volume

When switching between pickups, they should all sound reasonably even in volume. There should be slightly more volume in the neck pickup, which is to be expected (as mentioned above.)

However, if your neck pickup sounds much louder compared to the bridge?

Here’s what you can do…

  • Raise the height of the bridge pickup – increase volume/output
  • Lower the height of the neck pickup – lower volume/output

How to Adjust Pickup Height

Tools needed:

  1. Philips screwdriver
  2. Measurement ruler

Adjusting pickups height is pretty straightforward. First, you need to locate both pickup height adjustment screws (one for each opposing side.)

Whether your pickups are single coils, humbuckers, P90s, etc. They can be located by the side of the pickup casing. However, some guitars have height adjustment screws on the back of the guitar (Danelectro guitars.)

Once located, use your Philips screwdriver to make the required adjustments…

  • To Raise Pickup – Turn screws clockwise
  • To lower Pickup – Turn screws anti-clockwise

Remember to evenly raise the bass and treble side of the pickup. You want to avoid having an uneven bass/treble output for that individual pickup.

Keep in mind that lowering or raising your pickups too much can negatively affect your guitar’s output, tone, and playability. I have covered all these issues later in the post.

How to Determine Correct Pickup Height

Now all guitars come installed with different pickups. Therefore, I can not give a definitive pickup height measurement that covers every type of guitar (no one size fits all here.)

Here’s are some handy video tutorials on adjusting pickup height on common pickup types.

Humbuckers
Single-coils
P90s

Consult Guitar Manufacturing Pickup Height Specifications

First, check your guitar manufacturer’s pickup height recommendations and cross-reference each guitar’s pickup height using a ruler.

This ensures that your pickups are at the appropriate range and checks whether an individual pickup is the root cause of the uneven volume.

Use Your Ears

The first step is to adopt a clean tone with no effects or signal modifiers.

Next, make the slight pickup height adjustments making small height adjustments. (use a measurement ruler to be more accurate.)

The next step is to test the volume levels on each pickup and see if each pickup produces an even output.

Make the adjustments until you ‘fine tune’ an even volume with good dynamics and tone without causing unwanted tone and playability issues (explained later in the post.)

Now, It would make sense to explain how pickup height affects volume.

How Pickup Height Affects Volume

Interestingly, guitar pickups function as small antenna stations. They receive string vibrations and convert this mechanical energy into an electrical signal.

This signal is carried through the electronics, guitar cable, then amplified back as sound waves for our ears to process.

In their simplest form, pickups create a magnetic field produced by the pickup’s pole pieces. The strength of the magnetic field depends on the distance of the pole pieces to the strings.

Therefore, adjusting the distance of the magnetic field alters not just the volume/output potential but also tone.

So what does this mean In theory? Well, raising the pickup closer to the string (magnetic field) increases the volume and output potential.

Whereas lowering the pickup decreases the distance and strength of the magnetic field. Therefore, it reduces the volume/output of the guitar.

Keep in mind there is a TON of physics at work here. My explanation only scratches the surface.

What If Happens If Pickups Are set Too high?

Adjusting your pickups too high can compromise the tone and playability of all electric guitars.

Essentially if your guitar’s strings are too close to the pole pieces, It can interfere with the string’s vibration and ability to freely oscillate.

The common issues problem are…

Tuning and Intonation Issues

If the pole pieces (magnets) are too close to the strings made from metal. It can compromise the string’s ability to freely vibrate.

Essentially, the magnets will constantly ‘push and pull’ on the strings knocking them out of tune and interfere with intonation.

Sure, raising the pickup height will result in a louder and stronger output.

However, the drawback is your guitar’s sound will be negatively affected.

Raising the pickup too high can cause ‘fret buzz’, which is another annoyance and drawback to the sound of your guitar.

‘Warbling’ Sound

The second issue directly relates to tone. Pickups that are raised too high can cause weird and funky ‘overtones,’ which is not a desirable sound you want to hear.

Suppose you pluck an individual string with a clean tone and closely listen to its vibration.

A ‘warbling’ sound is a clear indication that the magnetism of the pole pieces is pushing and pulling the strings causing a strange ringing sound. The solution would be to evenly raise the pickup to remove this issue.

What Happens If Pickups Are Set Too Low

The problem with lowering your pickups too low is that it causes unwanted effects concerning tone and performance.

Decreasing the pickup’s magnetic field too far in relation to the strings hinders its ability to produce ‘rich’ and ‘dynamic’ ‘overtones.’

Essentially, the guitar will sound pretty ‘flat’ and ‘lifeless’ because the lack of space between the pole pieces and string causes the vibration to deaden. Leading to a pretty weak and flat-sounding pickup.

Can Pickup Height Effect Sustain?

The short answer is yes. Not only does adjusting pickup height alter the guitar’s volume (as mentioned above), but it also saps sweet sustain along with it.

‘Sustain sap’ occurs if you excessively lower your pickups because the distance of the strings is further away from the pickup’s magnetic field. Resulting in a weaker and less prominent signal.

Therefore, the rule of thumb is not to excessively lower your pickups. This results in a noticeable drop in volume, sustain, and output.

On the other hand, players make the classic mistake of adjusting their pickups too high.

Thinking that they will get more output, sustain, and dynamics. However, doing so can cause a host of unwanted guitar issues (mentioned above.)

When adjusting pickup height, the general rule of thumb is to find the ‘sweet spot’ with your guitar in terms of volume, response, and your playing style.

Do Humbucker Covers Change Tone?

Humbucker covers are there for a solid reason. They primarily shield your exposed double-coils from dirt, grime, and sweat (nasty!)

They also serve as an aesthetic appeal. However, there is a debate raging in the guitar community whether exposed vs. covered affects tone.

Well, In my opinion, yes, uncovered humbuckers sound fractionally brighter with a bit more clarity and definition.

This is ideal if you are a lead player and want to squeeze and pronounce the tone of every note. Not to mention they look much cooler in my opinion (I am a Slash fan after all.)

The theory is that uncovered humbuckers are exposed to air, allowing them to pickup up more string vibrations resulting in a fractional increase in articulation.

On the other hand, covered humbuckers serve better at protecting your coils. However, players debate they sound fractionally ‘warmer’ compared to exposed humbuckers.

This is all just opinion, but a good idea would be to experiment and see yourself. Also, choose what aesthetically appeals to you more.

If you want to delve into this debate more. I have covered this topic in my post “covered vs. uncovered pickups” (you can read this post here)

Why Some Pickups Are Angled/Slanted

Have you ever noticed the slanted bridge pickup on a Stratocaster, Telecaster, and other guitars? Well, there’s a good reason for the angled design.

The reason is that the angle squeezes more high frequencies and low frequencies from that specific pickup.

As mentioned above, the closer the pickup is to the saddle, the brighter it sounds, and the higher up the neck, the warmer it sounds.

Therefore, the angle is there to achieve simultaneously additional treble and lows. This gives the angled pickup a more even and balanced sound.

As we know, the bridge pickup with single pickups (especially single-coils) sounds super bright and articulate. The angle provides additional bass whilst also adding high frequencies to offer a more balanced and ‘tighter’ tone.

Some players prefer the angled design because they argue it provides a slightly better bass response, especially when plucking/digging into the thicker low strings.

Whereas straight single-pickup sounds a little more ‘tinny’ and ‘articulate. However, some players prefer maximum brightness for their ideal tone, whether shimmering cleans or piercing articulate notes.

Keep in mind the angled design is totally a ‘personal choice’ to the player as there is no ‘right or wrong’ choice when it comes to tone. Whatever sounds best to you is the right choice, whether it’s angled vs. straight.

I have an article all about this topic if you want to know who was responsible for the angled design. (You can read this post here!)

Wah Pedal vs. Auto Wah (Key Differences Explained)


Manual wah or auto-wah? Although they produce similar sounds, how do you choose the right fit for you?

In this post, you’ll learn the key differences to help you make a decision for your next wah.

What is the difference between a wah pedal and auto-wah?

A traditional wah pedal is an expression-based effect allowing a player to control the ‘wah sweep’ with the foot. In comparison, an auto-wah pedal creates an envelope filter loop that can be controlled with the pedal’s parameters and is more sensitive to picking dynamics.

Traditional Wah Pedal

Pros

  • More intuitive dynamics
  • More Expresive
  • Combines superbly with Distortion/Overdrive/Fuzz pedals
  • Simpler to use
  • Easy for beginners
  • Manual Wah Pedals are a lifetime pedal

Cons

  • Less tonal effects
  • Full-size pedals take up more pedalboard room
  • Slightly more expensive
  • Not battery operated

Manual Wah (Best Choice If…)

  • You want manual control over the sweep and dynamics of the wah effect
  • You want to actuate specific notes and chords, adding more texture to your playing
  • You want to ‘learn ‘wah control basics
  • You are a beginner and want a simple pedal with less complicated controls
  • You play heavier genres of music as they are more popular with manual wah pedals
  • You prefer the sound of a ‘natural’ sound of ‘human-controlled’ wah
  • You like to use dirt pedals in your sound (distortion, fuzz, overdrive)

Auto-Wah – Pros & Cons

Pros

  • More tonal options (with more advanced pedals)
  • Create a custom wah sound
  • ‘Choppy’ sound
  • Allows you to concentrate on playing
  • Set it and forget it
  • Dynamic response to your picking dynamics
  • Don’t need to operate an expression pedal
  • Many affordable options to choose from

Cons

  • Some argue they ‘sap the tone’ from your signal
  • Sound a little ‘robotic’
  • Confusing to beginners
  • Difficult to dial in a wah sound ‘on the fly’
  • Don’t react as well to high-gain pedals

Auto-Wah (Best Choice If…)

  • You want to create and ‘fine-tune’ a custom wah sound
  • You like to run around on stage and let the pedal do the work
  • You are an advanced player who understands EQ parameters
  • You play genres like Funk, R&B, and Soul (popular auto-wah genres)
  • You prefer the autonomic sound of the auto-wah sweep
  • You want more modes offering more tonal sounds and possibilities
  • You don’t mind resetting the dial parameters for different songs

Traditional Wah Pedals – 101

The iconic wah pedal is a serious staple in many tone junkies’ arsenal.

Some argue it’s the most expressive pedal out there. Why? It is closest to an expressive ‘vocal-like’ effect on guitar.

The main advantage of the classic wah is the ‘wah sweep’ is controlled by your foot motion.
This allows you to add your own natural accents on certain notes depending on your expression and instinct to shine and cut through a mix.

Trumpet and trombone players used early renditions of the wah back in the 1920s effect to enhance their expressive playing. It was soon adapted to an electronic circuit for the guitar, with the same basic principle.

Legendary Players noted for using a wah pedal are Jimi Hendrix, Slash, Zack Wylde, Kirk Hammett, Joe Satriani (the list goes on.)

Why You Need a Wah Pedal (Video Below)

How Does it Work?

Essentially, when your toe is all the way down, the pedal adds ‘treble frequencies,’ and when your foot is all the way up, it removes ‘bass frequencies.’ This quick shifting of high to low frequencies is what creates the famous ‘wah-wah’ sound.

The manual wah is an industry staple thanks to its fun and expressive feel. This allows you to…

  • Highlight certain notes or chords to add more expression and feel
  • Cycle between sweeping ‘on-beat’ or ‘off-beat’ adding texture to your playing
  • Create slow or fast ‘filter sweeps’
  • Sweep to your desired tempo or feel

Where Does a Wah Pedal Go In The Signal Chain?

Typically, a wah should go at the very beginning of your signal chain following the compressor and volume pedals.

In simple terms, this allows the wah to work as clean as possible and to thoroughly modify your core distortion.

This is because the wah will react easily to the varying signal reactions of modular and distortion pedals.

However, a popular alternative to this traditional setup is to place the wah right after the distortion. Mainly, this will enable a fatter sound which is great for experimenting, however, it is less rich in harmonics.

Dunlop Original Cry Baby Wah

The GCB95 is straight out of the 60s, played by Hendrix, Clapton, and countless more guitarists. It’s a power-packed vintage tone that allows you to drive in your own direction, parting from its classic sound.

Its heavy-duty design guarantees lifetime endurance, and it’s the blueprint for all other wah pedals out there.

Dunlop Cry Baby Wah Mini 535Q

Meant to be superbly efficient, this mini updated classic balances out a convenient size with tone customization to your preference. Its neat Q control also allows you to shape your wah’s sweeping response as you rock back and forth.

It houses a fairly vintage sound with minimal sacrifice as an addition to its volume control and conservative harmonics.

Vox V847A Wah-Wah Pedal

Yet another vintage original from the 60s, the Vox V847A has improved dynamics while remaining loyal to its sweeping feel.

The remarkable thing about this updated loyal piece is its added input buffer, preserving your signal even when turned off. This is a great option if you’re into a classic vibe but looking for extra control over your pedals.

Morley 20/20 Classic Wah Pedal

The springloaded switchless activation 20/20 Classic Wah gives the traditional pedal an intuitive and practical alternative.

Basically, it activates the wah when you step on the treadle and start rocking it. It also features a great 20/20 buffer circuit to guarantee a complete and unhinged sound. Finally, it has a rather convenient size and glow-in-the-dark rubber, so you never lose sight of it.

Jim Dunlop 105Q Bass Wah Effects Pedal

As a bass pedal, this one focuses on mids and highs while preserving lows in a unique way. It also comes with a Q dial which allows you to set your own wah range to mold your effect.
The tone here is widely customizable, which makes for a greatly creative pedal in all aspects.

Auto-Wahs – 101

Precise, choppy, and essentially rhythmic, the auto-wah (also known as an envelope filter) is key if you’re looking to add depth and customization to your ideal wah tone.

Now the auto-wah does a similar thing but more techy and crafted way.

In essence, an auto-wah simulates if you were rocking back and forth on a manual wah like clockwork. Instead of doing the work, you set the wah sweep, tone, and more. Giving you custom creation of your perfect wah sound.

Furthermore, an auto-wah is a touch-sensitive pedal. Meaning it reacts in intensity depending on hard you dig into the strings. The harder you pick, the more the tone and dynamics of the pedal shine.

Not only that, some advanced auto-wah pedals come with fancy bells and whistles, such as a ‘humanizer mode’ to simulate talking voices and the ability to produce talkbox-style sounds.

Created in the 1970s, the auto-wah was made to push the boundaries of human playing. During that time, It was popularized by the sound of many Funk and Disco records. Ultimately, experimental rock musicians picked it up, searching for a more precise tool.

How Does it Work

Essentially, an auto-wah produces an envelope filter loop that starts when the note begins and stops when the note dies.

The parameter dials modify the envelope filter loop (wah sound.) Meaning you can intricately craft a custom wah sound depending on your preference. Essentially, you can design your custom wah effect.

Auto-Wah Parameters Explained

  • Tempo – the rate of the wah filter sweep (faster or slower sweep)
  • Tone – the ceiling range of the high/low frequencies
  • Sensitivity – How sensitive the pedal is to your picking dynamics
  • Decay – How long the effect lasts before it dies out
  • Modes – Extra fancy modes or presets

Where Does an Auto-Wah go in the Signal Chain?

The auto-wah goes right after your volume and compressor pedals, as close to the main signal as possible. Mainly because the closer it gets to the guitar’s signal, the better dynamic and response it will have.

Some may even recommend placing the auto-wah at the very beginning of the pedalboard for this exact reason. On the other hand, and very similar to the traditional wah, others suggest placing it right after the overdrive.

The reason? The dynamic and tone management can become very interesting when modifying a “cooked” thick sound.

Fender Pour Over Envelope Filter Pedal

This brand new Fender station is deemed as one of the most complete filters in the market right now. It houses the peaks and valleys of the auto-wah but also the “cocked” reaction a great envelope filter can provide.

This one also features a drive with its respective switch that enables whether it pushes the signal up or down.

Boss AW-3 Dynamic Wah Pedal

For decades now, the most famous auto-wah is praised for its envelope and human voicings. The AW-3 is “dynamic,” meaning it responds to your picking and thus adds its effect accordingly.

It also comes with its renowned humanizer effect, letting you choose its ending vowel sounds for a more expressive sound.

Electro-Harmonix Nano Q-Tron

For bass and guitar, the Nano Q is one of the most simplistic and high-quality filters in the market. It also enables you to choose the bandpass frequency for the filter with its mode knob.

For playability, simplicity, and quality, this one is a winner. Drive adjusts the sensitivity to your sweeping and Q to set the peak bandwidth to mix the effect.

EarthQuaker Devices Spatial Delivery V2

The core of this pedal is its three modes with its toggle switch. It has an up, down, and a sample and holds sweep mode. The latter randomizes the voltage filter.

The up and down sweep modes engage with the additional controllers to determine the voicing you want for your attack. It offers high-pass, bandpass, and low-pass filters.

MXR M82 Bass Envelope Filter Pedal

The separate FX level and DRY controls do allow you to tailor the tone of your effect to the bare detail. This MXR preserves the percussiveness of the instrument you choose how much bass and how much wah. All while keeping your lows intact. It does have a couple of traditional features such as a Decay, EQ, and SENS